Best Melee Build: Sword & Shield Guide
Arms of God Best Melee Build: Sword & Shield Meta Guide
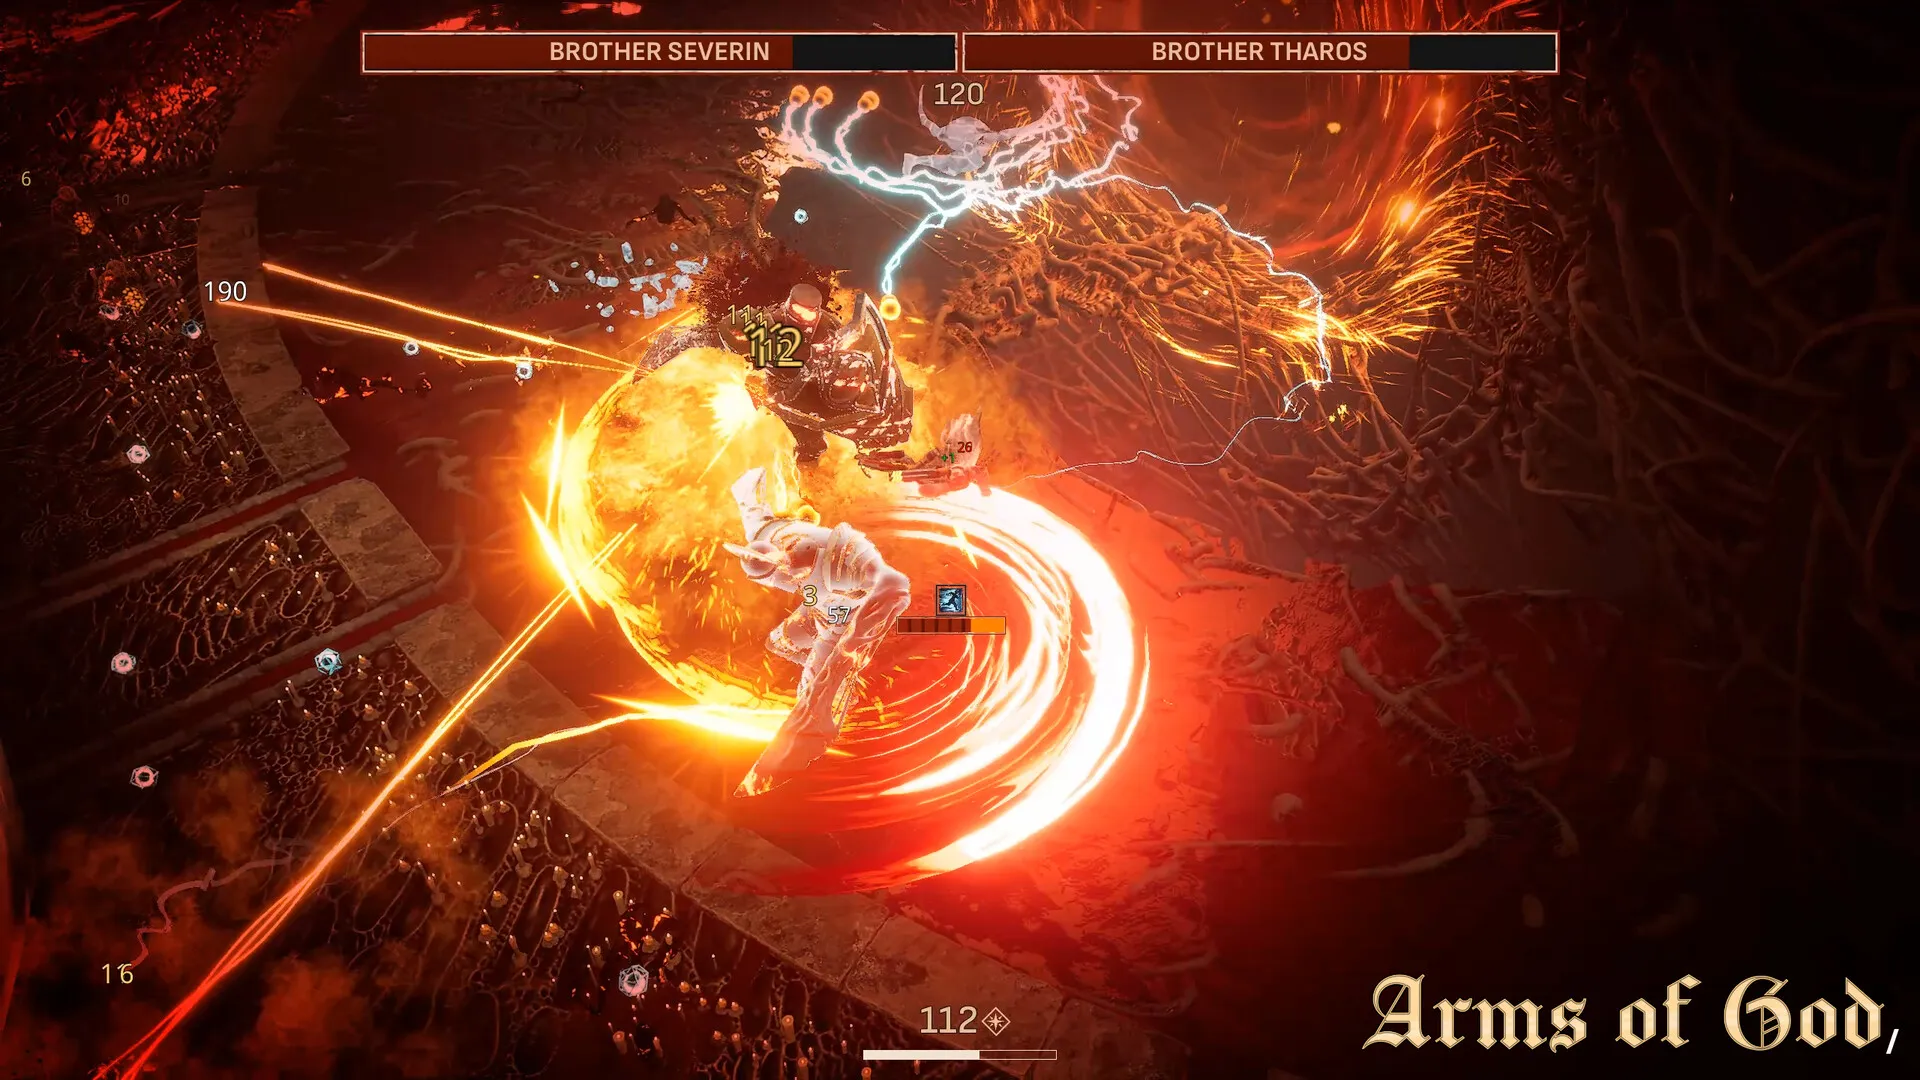
Let's address the elephant in the room: the Arms of God community has largely written off melee builds. Browse any Reddit thread, any Discord discussion, any YouTube tier list as of June 2026, and you'll hear the same refrain — "melee is unplayable in Act 4," "ranged is objectively better," "why would you stand next to enemies when you can shoot them from across the screen?"
There's truth in the criticism. A poorly built melee loadout will get you killed faster than anything else in the game. The Inquisitor with an Infernal Repeater can clear waves from complete safety while you're eating every bullet pattern at point-blank range. The math, on paper, favors ranged.
But the community consensus misses something important: melee builds scale differently. They scale with survivability stats that ranged builds ignore. They benefit from enemy density in ways ranged builds cannot match. And when built correctly — with the right weapon synergies, the right blessing priorities, the right Cathedral path — a melee build doesn't just survive Act 4. It dominates it.
This guide is the counter-narrative. It's the build that proves melee is viable but optimal in specific scenarios: high-density trash waves, narrow corridor maps, and bosses with melee-range blind spots. If you've dismissed melee as a meme, read on.
Why the Community Is Wrong About Melee (And Where They're Right)
Before we build the loadout, we need to understand why melee has a bad reputation — and which criticisms are valid versus which are skill issues.
Valid criticism: melee has lower damage uptime in open arenas. In large, open Act 3 and Act 4 rooms, enemies spawn across the map. A ranged weapon is dealing damage during the entire approach. A melee weapon deals zero damage until the enemy closes distance. Over a 90-second wave, this can mean 20-30 seconds of lost damage output compared to ranged.
Valid criticism: melee takes unavoidable chip damage. No matter how good your movement is, standing in melee range means you will eat attacks that a ranged build simply walks away from. Act 4 elite bullet patterns overlap to the point where melee-range dodging is genuinely harder than long-range dodging.
Where the community is wrong: melee scaling is underrated. Melee weapons benefit from knockback, armor, HP, and life steal — stats that ranged builds treat as low-priority consolation picks. A melee build at full power isn't just tankier than a ranged build; it converts that tankiness into damage through proximity bonuses, Holy damage scaling, and AOE effects that trigger on-hit. A Chainsword at rank 5 with max knockback blessing doesn't just survive a trash wave — it deletes the wave before enemies can complete their attack animations.
Where the community is wrong: melee has higher burst damage. The highest single-hit damage numbers in the game belong to melee weapons. A Judgment Blade crit with Holy damage blessings can exceed 6,000 damage in a single swing. Hellfire Magnum crits cap around 4,500. When a boss has short vulnerability windows between attack patterns, melee's burst advantage matters.
Where the community is wrong: some maps favor melee. Act 2's Cathedral Crypt and Act 4's Sanctum Hallway are narrow corridors where enemies approach in dense columns. In these maps, a melee weapon with AOE and knockback clears faster than any ranged weapon — because every swing hits 8-12 enemies simultaneously, and knockback creates a permanently safe zone in front of you.
Core Advantages of Melee Builds
Understanding why melee works starts with the mechanics that only melee can exploit.
Holy Damage Synergy. The strongest melee weapons — Chainsword, Holy Hammer, Judgment Blade, Righteous Blade — deal Holy damage. Holy damage blessings scale multiplicatively with melee damage blessings, and several melee-exclusive Cathedral upgrades (Sanctified Steel, Divine Bulwark) add flat Holy damage to all melee attacks. A Holy-specialized melee build deals damage that matches or exceeds fire-specialized ranged builds against most enemy types, with the added benefit that Holy damage ignores a percentage of enemy armor in Act 3 and Act 4.
Knockback as Offense. Knockback is a dead stat for ranged builds — pushing enemies away from your projectiles' optimal range reduces DPS. For melee, knockback is simultaneously defense and offense. Enemies pushed back are enemies not attacking. Enemies pushed into walls take collision damage (a hidden mechanic that most players don't exploit). And enemies pushed into clusters become AOE fodder for your next swing.
Life Steal Efficiency. Life steal restores HP based on damage dealt. Melee weapons deal their damage in large, single-instance chunks (a Chainsword swing hits for 800+ at rank 5). Life steal triggers per hit, not per point of damage, but the percentage restored is based on the hit's total damage. A 5% life steal blessing on a Chainsword dealing 800 damage restores 40 HP per swing. In a dense wave where you're hitting 6 enemies per swing, that's 240 HP per attack — roughly 30-40% of a fully upgraded HP bar. Ranged weapons with faster but weaker hits restore less HP per trigger.
AOE Clear Speed. Most melee weapons have inherent AOE — a swing arc that hits everything in a cone or radius. Ranged weapons need specific blessings (piercing, chain, splash) to achieve multi-target damage. In Act 3 and Act 4 waves where 40+ enemies are on screen simultaneously, a melee weapon with AOE clears the screen faster than any single-target ranged weapon.
Proximity Blessing Synergy. Several blessings specifically reward close-range combat: Retribution Aura (deal damage to all nearby enemies when hit), Consecrated Ground (create Holy damage zones at your feet), and Martyr's Resolve (damage increases as HP decreases). These blessings are nearly useless on ranged builds but define melee build power curves.
Best Melee Weapons Ranked
This tier list ranks melee weapons on DPS, survivability contribution, blessing synergy, and consistency across all four Acts. All weapons are evaluated at max rank with full Cathedral upgrades.
S-Tier (Build-defining, center your loadout around these)
| Weapon | Damage Type | Base DPS | Key Trait |
| --- | --- | --- | --- |
| Chainsword | Holy | ~170/sec at rank 5 | Wide arc, multi-hit per swing, knockback scaling |
| Holy Hammer | Holy | ~220/hit at rank 5 | Highest per-hit melee damage, AOE shockwave |
| Judgment Blade (Chainsword + Holy Hammer fusion) | Holy | ~260/sec at rank 5 | Screen-wide arc, burn + holy dual damage, life steal bonus |
Chainsword is the best all-around melee weapon in the game. Its wide swing arc hits everything in a 180-degree cone in front of you. At rank 5, each swing deals three rapid hits — functionally multiplying attack speed blessings by three. With max knockback, enemies never reach you. With life steal, you outheal all non-elite damage. The Chainsword is the foundation of every competitive melee build.
Holy Hammer is the melee boss killer. Its per-hit damage is the highest among all melee weapons, and its rank 5 trait adds an AOE shockwave that deals 50% damage to all enemies within a radius around the primary target. Against bosses, the shockwave hits the boss twice (direct hit + shockwave), giving the Hammer a 1.5x damage multiplier against single targets. Against trash waves, one Hammer swing clears everything in a screen-width radius.
Judgment Blade is what you get when you fuse Chainsword and Holy Hammer. The fusion inherits the Chainsword's multi-hit arc and the Holy Hammer's shockwave, then adds a screen-wide Holy flame wave on every third swing. It. gains a passive +15% life steal effectiveness and converts 20% of your armor value into flat Holy damage. A fully built Judgment Blade with max armor blessings and Divine Bulwark can deal 400+ damage per swing before crits — and it swings three times per attack animation. This is the weapon that makes Act 4 bosses look like Act 1 elites.
A-Tier (Excellent, strong synergies)
| Weapon | Damage Type | Base DPS | Key Trait |
| --- | --- | --- | --- |
| Righteous Blade | Holy | ~140/sec at rank 5 | Piercing thrust, backline reach, elite bonus damage |
| Sanctified Buzzsaw | Holy | ~155/sec at rank 5 | Continuous spin, infinite cleave, Paladin synergy |
| Thunderstrike Gauntlets | Shock | ~130/sec at rank 5 | Chain stun, attack speed scaling, hybrid flex slot |
| Demon Claw | Fire | ~145/sec at rank 5 | Bleed stacking, life steal scaling, fire/melee hybrid |
Righteous Blade has a piercing thrust attack that hits enemies in a line rather than an arc. This makes it uniquely good at reaching backline ranged enemies that hide behind trash mobs — a weakness that most melee builds struggle with. Its +25% damage against elite enemies at rank 5 makes it the best melee weapon for elite-heavy waves.
Sanctified Buzzsaw spins continuously while the attack button is held, dealing damage to everything in a 360-degree radius. On the Paladin specifically, the Buzzsaw gains +30% spin speed from the Paladin's passive and applies Holy vulnerability to all enemies hit. In narrow corridor maps, a Paladin with Sanctified Buzzsaw can literally walk forward and clear everything without stopping.
Thunderstrike Gauntlets are the best shock-damage melee weapon and the only melee weapon with inherent chain stun. Every third hit stuns the primary target and chains to 2 nearby enemies. The stun duration scales with attack speed blessings, making this a surprisingly effective crowd-control weapon in melee-flex hybrid builds.
Demon Claw is the highest-risk, highest-reward melee weapon. It applies a stacking bleed with every hit (up to 10 stacks for 60 DPS per stack at max rank), and its life steal multiplier increases with each bleed stack on the target. Against bosses, a full 10-stack bleed plus max life steal makes you nearly unkillable. The downside: it has the shortest melee range in the game, requiring you to be practically inside the enemy's hitbox.
B-Tier (Solid fillers, situational value)
| Weapon | Damage Type | Base DPS | Key Trait |
| --- | --- | --- | --- |
| Crusader's Mace | Holy | ~110/sec at rank 5 | Armor-to-damage conversion, tank scaling |
| Flaming Axe | Fire | ~120/sec at rank 5 | Fire pool on kill, AOE damage over time |
| Shock Baton | Shock | ~100/sec at rank 5 | Parry mechanic, stun on perfect block |
| Blessed Spear | Holy | ~115/sec at rank 5 | Extended melee range, safe poking tool |
| Reaper's Scythe | Fire | ~125/sec at rank 5 | Execute threshold, scaling damage vs low HP enemies |
Crusader's Mace converts 15% of your armor value into flat damage at rank 5. On a tank build with 200+ armor, this adds 30 flat damage to every hit — a significant boost for a weapon with fast attack speed. It's the best B-tier option for pure tank characters.
Flaming Axe creates fire pools on enemy kill, dealing 40 DPS for 4 seconds in a small radius. In dense waves where you're killing enemies rapidly, overlapping fire pools can deal hundreds of DPS in passive AOE damage. The downside: fire damage doesn't benefit from Holy damage blessings, creating anti-synergy in a Holy-focused melee build.
Shock Baton is the only melee weapon with a parry mechanic. Timing your attack to coincide with an enemy's attack animation triggers a perfect block, negating all damage from that attack and stunning the enemy for 2 seconds. The skill ceiling is high, but a player who masters Shock Baton parry timing can clear Act 4 without taking a single hit.
Blessed Spear has the longest melee range in the game — roughly 1.5x standard melee range. This extra distance is enough to hit enemies while standing outside most melee-range attack hitboxes. For players struggling with melee's inherent danger, the Blessed Spear is a training-wheels weapon that teaches melee positioning with a safety buffer.
Best Characters for Melee Builds
Three characters are built from the ground up for melee. Playing melee on any other character is possible but strictly suboptimal.
The Crusader — The Undisputed Melee King. The Crusader's passive grants +2 armor per melee weapon equipped and converts 10% of total armor into Holy damage. At rank 5 passive (max level), this becomes +4 armor per melee weapon and 15% conversion. With five melee weapons, that's +20 armor before any blessings or Cathedral upgrades. With Divine Bulwark (Cathedral upgrade), a fully built Crusader reaches 250+ armor — which converts to ~38 bonus Holy damage on every melee hit.
The Crusader. has a unique active ability: Bulwark of Faith. For 8 seconds, gain +100% armor, immunity to knockback, and a damage aura that deals 80 Holy DPS to all enemies within melee range. The cooldown is 25 seconds, reduced by 1 second per melee kill. In Act 4 elite waves, Bulwark of Faith is permanent — you're killing enough enemies to reset the cooldown before the duration ends.
Loadout: Chainsword (primary) > Holy Hammer > Righteous Blade > Crusader's Mace > Sanctified Buzzsaw.
The Paladin — Sustain and AOE Specialist. The Paladin's passive heals 3% of max HP per melee kill and adds +15% Holy damage to all attacks while above 80% HP. The healing passive alone makes the Paladin the most forgiving melee character — you can make positioning mistakes that would kill any other character and heal back to full within seconds of clearing a wave.
The Paladin's active ability, Holy Ground, creates a consecrated zone at your feet for 12 seconds. All enemies within the zone take 60 Holy DPS, and you gain +30% life steal effectiveness while standing in it. Place Holy Ground at a choke point and nothing gets through.
Loadout: Sanctified Buzzsaw (primary) > Chainsword > Holy Hammer > Blessed Spear > Shock Baton.
The Martyr — High-Risk, Maximum Burst. The Martyr's passive increases damage by 2% for every 1% of missing HP and reduces all healing received by 50%. At 10% HP, the Martyr deals +180% damage. This is the highest damage ceiling in the game — higher than the Zealot's +99% at 1 HP — but balanced by the healing reduction. Life steal is halved, and HP blessings are less effective.
Playing the Martyr as melee is the hardest challenge in Arms of God. You need to balance at low HP for maximum damage without dying to a single hit. The payoff: a Martyr at 5% HP with Judgment Blade, Consecrated Ground, and Retribution Aura deletes bosses in under 10 seconds. This is the speedrun character.
Loadout: Judgment Blade (primary, fuse ASAP) > Demon Claw > Holy Hammer > Flaming Axe > Reaper's Scythe.
Honorable Mention: The Inquisitor (Melee Flex). While the Inquisitor is primarily a fire-ranged character, the +25% fire damage passive works with fire melee weapons (Demon Claw, Flaming Axe). A hybrid Inquisitor build with two fire melee weapons and three fire ranged weapons can pivot between ranges as the situation demands. Not optimal, but viable for players who want melee options without committing to a full melee character.
Blessing Priority for Melee Builds
Blessing selection for melee is fundamentally different from ranged. Where ranged builds prioritize damage multipliers (projectile count, attack speed, fire damage), melee builds prioritize survival stats that convert into damage through melee-specific mechanics.
Tier 1 (Must-pick, every time)
1. Armor. This is the melee equivalent of projectile count for ranged builds. Armor reduces all incoming damage by a percentage and — critically for Crusader and Crusader's Mace users — converts into bonus Holy damage. Max rank armor blessing (+60 armor, roughly 35% damage reduction) is the single most impactful blessing for melee survival and, on the Crusader, for melee damage output.
2. Knockback. Increases the distance enemies are pushed by melee attacks. At max rank, a Chainsword swing pushes enemies roughly half a screen away. Combined with the Chainsword's wide arc, this creates a permanent safe zone in front of your character. Knockback. triggers wall collision damage (enemies take 40 damage when knocked into terrain).
3. Life Steal (or HP Regen, character-dependent). Life steal restores HP on hit. HP regen restores HP passively over time. The choice depends on your character: Crusader and Martyr prefer life steal (they deal high per-hit damage), Paladin prefers HP regen (synergizes with his passive heal-on-kill and the "above 80% HP" Holy damage bonus).
Tier 2 (Strong picks, prioritize after Tier 1)
4. Holy Damage. The majority of S-tier and A-tier melee weapons deal Holy damage. Holy damage blessing at max rank adds ~40% to all Holy weapon output and ignores a percentage of enemy armor. Less impactful than armor or knockback for melee (survival comes first) but essential for meeting Act 4 damage checks.
5. Max HP. More HP means more hits you can survive, more effective life steal (you heal for a percentage of a larger pool), and more value from Martyr's damage-at-low-HP passive. Max rank HP blessing (+80 HP, roughly 40% more base HP) is the difference between surviving 4 hits and surviving 6 hits from an Act 4 elite.
6. Melee Damage. Flat melee damage increase. Take it when offered, but never prioritize it over the survival stats above. A dead character with +50% melee damage deals zero DPS. An unkillable character with +0% melee damage still clears the wave.
Tier 3 (Situational, build-defining in specific setups)
7. Retribution Aura. Deals Holy damage to all nearby enemies when you take damage. At max rank, the aura deals ~100 damage per hit taken in a melee-range radius. This blessing alone can clear trash waves while you focus on dodging elite attacks. Essential for Martyr builds.
8. Consecrated Ground. Creates Holy damage zones at your feet every 15 seconds. Each zone deals 50 DPS for 8 seconds in a small radius. Stacks with itself (up to 3 zones simultaneously at max rank) and with the Paladin's Holy Ground ability. Turns any stationary fight into a damage-over-time kill zone.
9. Attack Speed. Increases melee swing speed. Third priority behind armor and knockback because melee weapons already hit multiple times per swing (Chainsword hits three times, Sanctified Buzzsaw spins continuously), reducing the marginal benefit of attack speed compared to ranged weapons.
Blessings to avoid on melee builds: Projectile Count (does nothing for melee weapons), Range (does nothing), Burn Duration (unless running Demon Claw or Flaming Axe as primary), Chain Count (unless running Thunderstrike Gauntlets).
Cathedral Upgrade Priority
The Cathedral upgrade path for melee is almost the inverse of the ranged path. Where ranged builds rush Gunsmith for attachment slots, melee builds rush Armory for weapon unlocks and Shrine for defensive blessings.
1. Armory — Rank 10 minimum, aim for rank 14.
Armory unlocks melee weapons and increases starting weapon rarity. Chainsword unlocks at Armory rank 4, Holy Hammer at rank 6, Sanctified Buzzsaw at rank 8, and the Judgment Blade fusion recipe at rank 10. At rank 14, you unlock Divine Bulwark — a melee-exclusive passive that adds +3 armor per equipped melee weapon and converts 5% of armor to Holy damage.
Getting Armory to rank 10 is your absolute first Souls priority. Without Chainsword and Holy Hammer, you cannot build the optimal melee loadout. Without the Judgment Blade fusion recipe, you cannot access the strongest melee weapon in the game.
2. Shrine — Rank 8 minimum.
Shrine is where ranged builds skimp and melee builds invest. Shrine upgrades increase the effectiveness of defensive blessings (armor, HP, life steal, knockback) and add defensive blessing slots. At rank 4, defensive blessings become 20% more effective. At rank 8, you unlock a fourth blessing slot (five total). At rank 12, defensive blessings become 40% more effective.
A melee build with Shrine rank 8 and max armor blessing has functionally double the survivability of a melee build with Shrine rank 2. This is not optional for Act 4.
3. Bell Tower — Rank varies by character.
Bell Tower provides character-specific bonuses. For melee builds, the Crusader's Bell Tower bonuses are the most impactful: rank 4 adds +2% armor-to-damage conversion, rank 8 adds +5 seconds to Bulwark of Faith duration, and rank 12 adds a second charge to Bulwark of Faith.
The Paladin's Bell Tower bonuses (rank 4: +5% Holy Ground damage, rank 8: +3 seconds Holy Ground duration, rank 12: Holy Ground follows you instead of being stationary) are. strong.
4. Training Ground — Rank 10 minimum.
Same as ranged builds. Even with armor and knockback, you will take hits as melee. Training Ground gives the HP buffer to survive those hits. Rank 10 is enough for Acts 1-3. Push to rank 14 for Act 4 consistency.
5. Alchemy Chamber — Rank 6.
Higher blessing rarity means finding Tier 1 defensive blessings (armor, knockback, life steal) more consistently. Less critical than the above four upgrades because melee builds want specific defensive blessings rather than a wide variety of offensive blessings, and defensive blessings appear at common rarity more frequently than offensive blessings.
Upgrade Priority Summary: Armory 10 > Shrine 8 > Bell Tower 8 (Crusader) or Bell Tower 4 (Paladin) > Training Ground 10 > Armory 14 > Shrine 12 > Alchemy Chamber 6.
Note: Gunsmith is almost entirely useless for melee builds. Do not invest Souls in Gunsmith if you are playing melee. The attachments it unlocks only apply to ranged weapons.
Weapon Fusion Routes
The melee weapon fusion system is deeper than the ranged fusion system because melee weapons have more fusion recipes and the fusion outcomes are more game-changing.
Primary Fusion: Chainsword + Holy Hammer = Judgment Blade
This is the melee build's equivalent of the ranged Infernal Repeater + Brimstone Pistols merge — the cornerstone fusion that defines the build's power curve.
Fusion requirements: Chainsword rank 5, Holy Hammer rank 5, Armory rank 10 (unlocks the recipe), 500 Souls.
Fusion result: Judgment Blade inherits the Chainsword's 180-degree multi-hit arc (3 hits per swing) and the Holy Hammer's AOE shockwave (50% damage to all enemies in radius).. Judgment Blade gains unique traits: every third swing unleashes a screen-wide Holy flame wave dealing 120 Holy DPS for 3 seconds to all enemies hit; +15% life steal effectiveness; and 20% of armor value converted to flat Holy damage.
Fusion timing: Fuse by wave 15-18 (late Act 2 or early Act 3). You need both donor weapons at rank 5, which typically requires reaching wave 12-14 with Souls saved for rank-up purchases. Delaying the fusion past wave 20 means facing Act 3 elite gauntlets without your power-spike weapon.
Fusion strategy: Prioritize leveling Chainsword to rank 5 first — it's your primary wave-clear weapon and will carry you through Acts 1-2. Level Holy Hammer to rank 5 second. Save 500 Souls from wave 10 onward. As soon as both weapons are rank 5, fuse immediately at the next Armory station.
Secondary Fusion: Crusader's Mace + Righteous Blade = Templar's Vengeance
Fusion requirements: Crusader's Mace rank 5, Righteous Blade rank 5, Armory rank 8.
Fusion result: A mace with extended reach (Righteous Blade's piercing thrust range) and doubled armor-to-damage conversion (30% instead of Crusader's Mace's 15%). At 200+ armor, Templar's Vengeance adds 60+ flat Holy damage per hit, making it the highest consistent single-target melee DPS in the game.
When to fuse: If you're running a pure tank Crusader build, fuse Crusader's Mace and Righteous Blade as your secondary weapon (slot 3 or 4). Keep Judgment Blade as primary.
Utility Fusion: Sanctified Buzzsaw + Shock Baton = Storm Reaver
Fusion requirements: Sanctified Buzzsaw rank 5, Shock Baton rank 5, Armory rank 6.
Fusion result: A continuously spinning weapon that applies chain stun on hit. Every enemy hit by the spin has a 25% chance to be stunned and chain the stun to 3 nearby enemies. In dense waves, Storm Reaver stunlocks the entire screen.
When to fuse: Paladin builds. The Storm Reaver's continuous spin + chain stun synergizes with Holy Ground to create a kill zone where enemies are stunned, taking Holy Ground damage, and being shredded by the spin. This fusion trivializes Act 3 corridor maps.
Merge Donor Priority for Melee: Holy Hammer (shockwave AOE) > Righteous Blade (piercing + elite damage) > Thunderstrike Gauntlets (chain stun chance) > Demon Claw (bleed stacking) > any weapon with high base damage.
Note: Melee weapon merges work differently from ranged merges. You're not merging for stat transfers (fire rate, projectile count) — you're merging for trait transfers (AOE shockwave, chain stun, piercing). The donor weapon's key trait is added to the recipient weapon's attack pattern.
Melee Positioning and Movement Guide
Melee positioning is an entirely different skillset from ranged kiting. Here are the tactics that separate melee players who die in Act 2 from those who clear Act 4.
The Wall Hug. Always position with a wall or terrain obstacle at your back. Enemies cannot spawn behind walls. With a wall at your back, your 180-degree Chainsword arc covers every possible enemy approach vector. Without a wall at your back, enemies spawn behind you and your melee arc misses them.
In open arenas without walls, use the edge of the arena as your "wall." Enemies cannot spawn outside the arena boundary, so the arena edge serves the same function.
The Knockback Rhythm. Don't hold the attack button continuously. Swing, observe the knockback push, take one step forward, swing again. This creates a rhythm where enemies are perpetually being pushed back and never reach attack range. The timing varies by weapon: Chainsword swings every ~0.6 seconds at base attack speed, Holy Hammer every ~1.2 seconds. Practice the rhythm until it's muscle memory.
The Elite Dance. Elite enemies have attack patterns that are deadly at melee range but have blind spots. Most Act 3 and Act 4 elites have a forward-facing attack cone. Standing directly on top of or slightly behind an elite puts you in its blind spot. Circle-strafe around elites while attacking — your melee swings hit them, their attacks fire in the wrong direction. This is high-risk (miss the blind spot and eat a full combo) but essential for minimizing damage against elite waves.
The Boss Hug. Act bosses have melee-range blind spots in their attack patterns. The Act 2 boss's sweeping beam cannot hit targets standing directly beneath it. The Act 3 boss's radial bullet burst has gaps at point-blank range. The Act 4 boss's Phase 1 horizontal sweep misses targets standing at its feet. Learning these blind spots lets melee builds deal continuous damage during phases where ranged builds are forced to dodge.
The Corridor Funnel. In narrow maps, position yourself at the narrowest point of the corridor and face the wider end. Enemies approaching from the wide end are funneled into a tight cluster — your AOE melee swing hits all of them. Enemies approaching from behind (the narrow end) arrive one at a time and are easily managed. Never position in the middle of a wide room with enemies approaching from multiple directions.
Dodge Weaving. Melee builds should dodge more than ranged builds, but the dodges are shorter. A quick dash through an enemy (not away from it) repositions you behind the enemy where their attack doesn't reach, while your melee weapon's back-swing still connects. Dodging away from enemies creates distance that melee weapons cannot cover — you end up chasing enemies instead of hitting them.
Act-by-Act Melee Strategy
Act 1 (Waves 1-8): The Frail Phase
Melee is weakest in Act 1 because you have no armor, no knockback, and no life steal. Play conservatively.
- Weapon priority: Secure Chainsword in the first three waves. If Chainsword doesn't appear, take Righteous Blade or Crusader's Mace as a temporary primary and swap to Chainsword when it appears.
- Blessing selection: Armor over everything. A single armor blessing in Act 1 reduces incoming damage by ~15%, which is the difference between dying to wave 7 elites and surviving.
- Positioning: Wall hug religiously. Do not chase enemies into open areas. Let them come to you.
- Souls spending: Save Souls. Do not buy rank-ups or blessings in the Act 1 shop. You need 500 Souls reserved for the Judgment Blade fusion and another 300-400 for rank-up purchases in Act 2.
Act 2 (Waves 9-16): The Scaling Phase
This is where melee starts to pull ahead of ranged in survivability. Your armor blessing should be at rank 2-3, and you should have at least one knockback blessing.
- Weapon priority: Secure Holy Hammer and begin leveling both Chainsword and Holy Hammer toward rank 5. Your loadout should be 3-4 melee weapons by wave 12.
- Blessing selection: Add knockback and life steal. Two points in knockback creates a noticeable safe zone. One point in life steal sustains you through trash waves.
- Fusion timing: If both Chainsword and Holy Hammer hit rank 5 by wave 15, fuse immediately. The Judgment Blade power spike will carry you through the rest of Act 2 and all of Act 3.
- Positioning: Start practicing the knockback rhythm. Act 2 enemies have longer attack ranges than Act 1 enemies, so the timing is tighter.
Act 3 (Waves 17-24): The Dominance Phase
If you have Judgment Blade by Act 3, you are now the strongest build on the screen. If you don't, prioritize the fusion immediately.
- Weapon priority: Judgment Blade should be your primary. Fill remaining slots with Crusader's Mace, Righteous Blade (or their fusion, Templar's Vengeance), and Sanctified Buzzsaw.
- Blessing selection: Push armor to rank 4+, life steal to rank 3+, and add Holy damage. The Act 3 damage check requires Holy damage blessing at rank 2+.
- Positioning: You can be more aggressive now. Judgment Blade's screen-wide flame wave clears trash before they reach you. Focus on elite positioning — circle-strafe elites while the flame wave handles everything else.
- Souls spending: Shift to blessings. Weapon ranks are important but blessing ranks are the bottleneck for Act 4.
Act 4 (Waves 25-30): The Proof
Act 4 is where ranged players will tell you melee is impossible. Here's how you prove them wrong.
- Weapon priority: Judgment Blade at rank 5, all other weapons at rank 4+. Templar's Vengeance as secondary, Sanctified Buzzsaw or Storm Reaver as tertiary.
- Blessing targets: Armor rank 5 (max), knockback rank 4+, life steal rank 4+, Holy damage rank 4+, max HP rank 3+. Retribution Aura should be rank 2+ for passive damage during elite waves.
- Positioning: The wall hug is life. Act 4 arenas are large, but every arena has usable walls and corners. Identify your wall before each wave starts.
- Wave 28-29 (elite gauntlet): Pop Bulwark of Faith or Holy Ground immediately. Focus on one elite at a time — Judgment Blade's third-swing flame wave will passively damage the others. Do not stand in the center of the arena.
- Final boss (wave 30): Phase 1 — stand at the boss's feet. The horizontal sweep misses you. Phase 2 — the radial burst has gaps at point-blank range; stand still and attack. Phase 3 (berserk) — use your defensive ability and face-tank while life steal sustains you. At max armor + max life steal + Judgment Blade, you can outheal the berserk phase damage.
FAQ
Q: Can melee really clear Act 4, or is this guide just theorycrafting?
A: Melee can clear Act 4 consistently — but it requires more investment, better blessing RNG, and tighter execution than ranged. A ranged build with Gunsmith 8 and Infernal Repeater can clear Act 4 with mediocre blessings and average positioning. A melee build needs Armory 10+, Shrine 8+, specific defensive blessings, and disciplined positioning. The floor is lower (bad melee runs die early), but the ceiling is comparable (good melee runs clear as fast as good ranged runs). If you're willing to invest the Souls and practice the positioning, melee is a fully viable path to Act 4 completion.
Q: Is melee viable for speedrunning or just for casual clears?
A: As of June 2026, the speedrun leaderboard is ranged-dominated — the Inquisitor with Infernal Repeater holds the Act 4 any% record at roughly 18 minutes. Melee speedruns are 2-3 minutes slower on average due to the time spent closing distance in large arenas. However, the Martyr melee build holds the Act 1-3 speedrun record because Martyr's damage-at-low-HP passive deletes early-game bosses faster than any ranged build can match. Melee speedrunning is a niche but real category.
Q: What should I do if Chainsword and Holy Hammer don't drop in my run?
A: Reset. Unlike ranged builds, which can function with B-tier weapons (Crusader's Shotgun, Sacred Bow) while waiting for S-tier drops, melee builds are heavily dependent on their core weapons. A melee run without Chainsword by wave 5 is a dead run — restart. As you unlock more Armory ranks and improve your starting weapon rarity, Chainsword appears more frequently in the first three waves. At Armory rank 14, Chainsword has roughly an 80% chance of appearing by wave 3.
Q: Should I ever take ranged weapons in my melee loadout for flexibility?
A: Generally no. Every ranged weapon in your loadout is a slot that could be a melee weapon providing armor (Crusader passive), life steal targets, and knockback coverage. One flex ranged weapon is acceptable for picking off distant backline enemies — Purifier's Crossbow is the best choice because its piercing Holy damage synergizes with Holy damage blessings you're already taking. But a five-melee loadout on Crusader with Divine Bulwark and max armor blessing is objectively stronger than a four-melee-one-ranged hybrid. Commit fully to melee or play ranged. The middle ground is the worst of both worlds.
Q: Is the Judgment Blade fusion actually worth the 500 Souls, or should I keep Chainsword and Holy Hammer separate?
A: Judgment Blade is worth it. A rank 5 Chainsword and rank 5 Holy Hammer used separately have a combined DPS of roughly 390 (170 + 220). A rank 1 Judgment Blade immediately after fusion deals ~260 DPS with the screen-wide flame wave adding ~120 AOE DPS — 380 total, nearly matching the two separate weapons while freeing an entire weapon slot. At rank 5, Judgment Blade deals ~400+ single-target DPS plus the flame wave, far exceeding what the two separate weapons could achieve. The 500 Souls cost is significant, but the freed weapon slot alone (which you fill with another A-tier melee weapon) justifies the investment.